- Published on
On-the-fly feature flag in Next.js with Google Sheets
It's simple yet performant!
- Authors
- Name
- Nico Prananta
- Follow me on Bluesky
Feature flags are a great way to manage feature toggles in your application. They allow you to enable or disable certain features. There are several common reasons why you might want to use feature flags:
- You want to release a new feature to a subset of your users.
- You want to test a new feature before releasing it to all users.
- You want to disable a feature for a specific user or group of users.
Feature flags are also useful when you or your team ships to production frequently and you want to make sure that you don't accidentally deploy a feature that is not ready. By using feature flags, you can hide unfinished features from your users until they are ready to be released. For example, maybe the UI of your app is ready but the backend is not. You can use feature flags to hide corresponding UI until the backend is ready.
There are several ways you can implement global feature flags that affect the entire application:
- You can set the flags during build time: You store the values of the flags in environment variables. To toggle the flag, you can change the values of the environment variables and then rebuild the application.
- You can set the flags during runtime: You store the values in a database or some remote storage. To toggle the flag, you can update the value in the database or remote storage and the app can automatically detect the change.
In this post, I'll show you how to implement feature flags in a Next.js application using Google Sheets. And since some code are also executed during build time by Next.js, the flags can be read from the Google Sheets during build time as well.
Few reasons why it is great to use Google Sheets:
- Collaborative: You can share the sheet with your team members and they can change flag values in real-time.
- Trackable: You or your team members can track the changes made to the sheet and see who changed the flag values and when. It's very useful when you need to
know who to blamefigure out the starting time of when unexpected behavior occurs. - Customizable: You or your team members can customize the sheet to fit your needs. For example, you can add more columns to the sheet to store additional information about the feature flags, such as the release date or the description of the feature.
- Familiar: It's a familiar tool that everyone are already familiar with, not only developers.
- Free: Not only it's free to use, you don't need to set up any servers or infrastructure.
Prerequisites
You need to make sure the Google Sheets project is private and can only be read and write by people you trust. When the Google Sheets can be viewed by anyone, we can use a simple REST API with Google API key to read the data. But when the sheet is private, we need to use a service account to authenticate the request.
As of this writing, follow these steps to create a service account:
- Go to the Google Cloud Console
- Navigate to "IAM & Admin" > "Service Accounts"
- Click "Create Service Account"
- Give it a name and click "Create"
- Grant this service account the necessary permissions (usually "Editor" role is sufficient)
- Create a key for this service account (JSON format)
- Download the JSON key file
I might miss some steps there but the goal is to get the JSON key file. From the JSON file, we just need the client_email and the private_key which we will store in environment variables:
GOOGLE_SERVICE_ACCOUNT_EMAIL=the-value-of-client_email-from-json-file
GOOGLE_PRIVATE_KEY=the-value-of-private_key-from-json-file
Another thing that is important is the ID of the Google Sheets that you want to use. You can find it in the URL of the sheet. For example, if the URL is
https://docs.google.com/spreadsheets/d/1-2-3/edit
then the ID is 1-2-3.
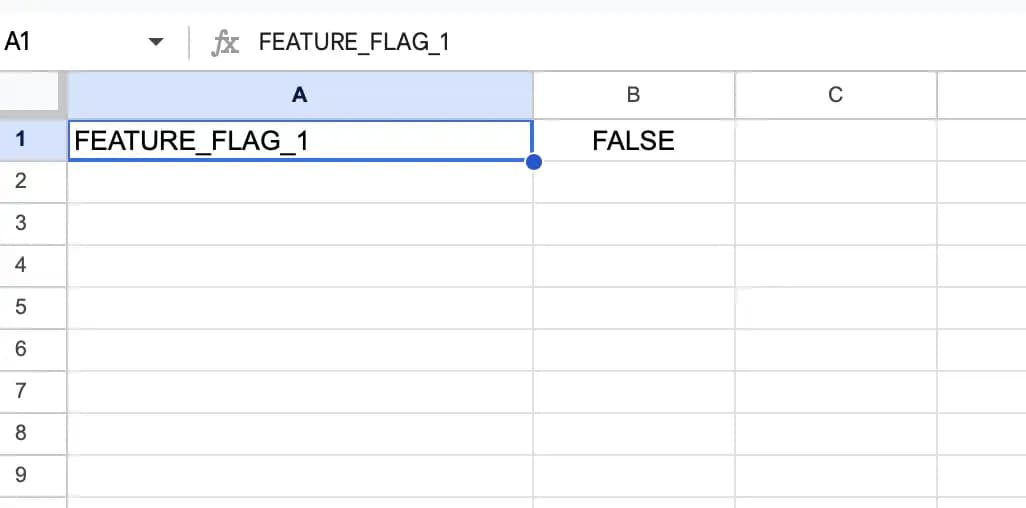
In the Google Sheets, we use column A as the key of flag and column B as the value of the flag as shown in the following image:
Image
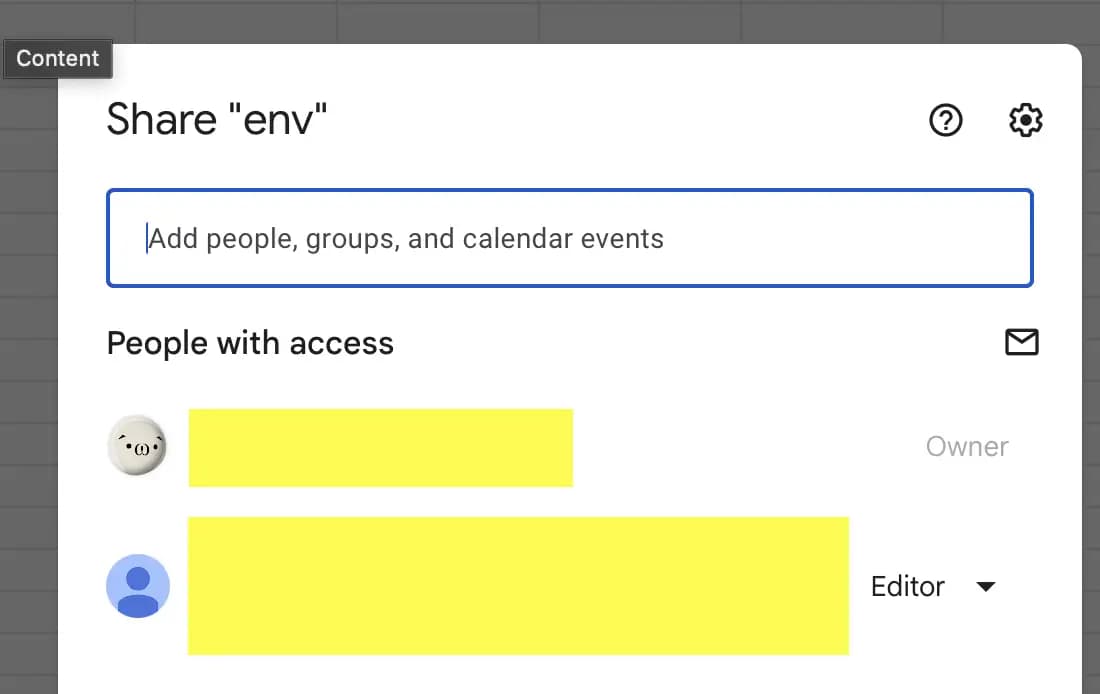
The last step is to allow the service account to access the Google Sheets:
- Go to the Google Sheets and click on the "Share" button.
- Click on the "Share with users" button and add the service account email address. The email address is the value of
client_emailin the JSON file. - You can also add the email addresses of the people you want to share the sheet with.
Image
Code
Now we implement the code to get the feature flags from the Google Sheets. First, we need to install the googleapis package:
npm install googleapis
Then, this is the function to get the feature flags from the Google Sheets:
import 'server-only'
import { google } from 'googleapis'
import { unstable_cache } from 'next/cache'

export interface SheetData {
  [key: string]: string
}

const _getPrivateGoogleSheetsData = async ({
  serviceAccountEmail = process.env.GOOGLE_SERVICE_ACCOUNT_EMAIL || '',
  privateKey = process.env.GOOGLE_PRIVATE_KEY || '',
  sheetId = process.env.GOOGLE_SHEETS_ID || '',
  range = process.env.GOOGLE_SHEETS_RANGE || 'A1:B',
} = {}) => {
  try {
    const auth = new google.auth.JWT({
      email: serviceAccountEmail,
      key: privateKey.replace(/\\n/g, '\n'),
      scopes: ['https://www.googleapis.com/auth/spreadsheets.readonly'],
    })

    const sheets = google.sheets({ version: 'v4', auth })

    const response = await sheets.spreadsheets.values.get({
      spreadsheetId: sheetId,
      range,
    })

    const sheetData: SheetData = {}
    response.data.values?.forEach((row: string[]) => {
      if (row[0] && row[1]) {
        sheetData[row[0]] = row[1]
      }
    })

    return sheetData
  } catch (error) {
    console.error('Error fetching Google Sheet data:', error)
    throw new Error('Failed to fetch Google Sheet data')
  }
}


export const getPrivateGoogleSheetsData = unstable_cache(
  _getPrivateGoogleSheetsData,
  ['sheets_data'],
  {
    tags: ['sheets_data'],
  }
)
_getPrivateGoogleSheetsData function is the main function that fetches the data from the Google Sheets. It's wrapped in unstable_cache function (line 44) because we don't want to always hit the Google Sheets API every time a user visits the page. And the great thing about unstable_cache is that it reuses the values of the function across multiple requests.
We also import the server-only package just to make sure that the function is only executed on the server.
Then we can use the function in any server component, for example:
export default async function Page() {
  let data: SheetData | null = null
  let error: string | null = null

  try {
    data = await getPrivateGoogleSheetsData()
  } catch (err) {
    error = 'Error fetching data from Google Sheet'
  }

  if (error) {
    return (
      <Card className="mx-auto w-full max-w-md">
        <CardHeader>
          <CardTitle className="text-red-500">Error</CardTitle>
        </CardHeader>
        <CardContent>
          <p>{error}</p>
        </CardContent>
      </Card>
    )
  }

  const featureFlag1 = data?.['FEATURE_FLAG_1'].toLowerCase() === 'true'

  return (
    <div className="space-y-4">
      <Card className="mx-auto w-full max-w-md">
        <CardHeader>
          <CardTitle>Key Values in Google Sheets</CardTitle>
        </CardHeader>
        <CardContent>
          <dl className="space-y-2">
            {data &&
              Object.entries(data).map(([key, value]) => (
                <div key={key} className="flex justify-between">
                  <dt className="font-semibold">{key}:</dt>
                  <dd>{value}</dd>
                </div>
              ))}
          </dl>
        </CardContent>
        <CardFooter>
          <RefreshButton />
        </CardFooter>
      </Card>

      <Card className="mx-auto w-full max-w-md">
        <CardHeader>
          <CardTitle>Feature Flag 1</CardTitle>
        </CardHeader>
        <CardContent>
          {featureFlag1 ? <p>Feature flag 1 is enabled</p> : <p>Feature flag 1 is disabled</p>}
        </CardContent>
      </Card>
    </div>
  )
}
If you noticed, the Page component above is a server component that is statically rendered during build time. So that means it will not change even when you change the FEATURE_FLAG_1 in the Google Sheets once it's deployed to production. But thanks to setting the tags in unstable_cache (line 48 in google-sheets.ts), we can force Next.js to rebuild the page in the background by manually revalidating the data. This can be achieved by creating a route handler as follows:
import { revalidateTag } from 'next/cache'
import { NextResponse } from 'next/server'

export async function GET() {
    revalidateTag('sheets_data')
    return NextResponse.json({ result: 'success' })
}
You can also create a server function and call the revalidateTag function in it. Either way, the goal is to be able to manually revalidate the cache with tag sheets_data. Once it's revalidated, the page will be rebuilt by Next.js and users will be able to see the updated page in their next visit.
Check out the demo here:
Hope you like this post. If you do, please share it with your friends and colleagues. I'm always looking for new ideas to share with my readers.
By the way, I'm making a book about Pull Requests Best Practices. Check it out!