- Published on
Running Long Jobs with Queues in Next.js using Bull and Redis
Offload those long running tasks to background workers without third party services!
- Authors
- Name
- Denny Pradipta
ℹ️ This is a guest post by my awesome fellow dev in Hyperjump Technology, Denny Pradipta.
When building web apps with Next.js, handling long-running tasks like data processing or sending emails can be tricky. You don’t want to keep your users waiting while the server completes the job, right? This is where background processing comes in handy.
In this article, I will share how we handle long processes in our uptime monitoring tool called Neo Sense using Bull—a powerful queue system built on top of Redis. Bull makes it easy to offload tasks to background workers, keeping your app fast and responsive. Plus, Redis helps manage the queue efficiently.
Prerequisites
Before we jump into handling long processes, let’s make sure we’ve got the basics covered. First off, you’ll need a Next.js app (but you probably already have that, right?). You can later deploy the Next.js app to Vercel or to your own server. However, the background process cannot be deployed to Vercel since Vercel only has serverless offerings. Hence it will need to be deployed to your own server.
Next, we need to install two key packages: Bull for managing the job queue and Redis for storing and managing the queues.
Here’s how to install both:
- Install Bull in your project.
npm install --save bull

# This is for running the queue
npm install --save tsx
- Install Redis. If you don’t already have Redis set up on your local machine, you can install it via Homebrew (for Mac users) or download it from the official Redis website. Here’s how to install it via Homebrew:
brew install redis
After installation, make sure Redis is running by using the command:
redis-server
Creating a new Queue and its Worker
Now that we’ve got Bull and Redis set up, it’s time to create the queue and its worker. You can think of a queue as the thing that monitors the jobs and a worker as the thing that actually does the job. In this example, we will offload the process of sending emails to a queue.
First, you’ll need to create a queues folder in the src folder. Inside that folder, create a new file called mail.ts.
Here’s the code to get started:
import Bull from 'bull'
import type { Job } from 'bull'

type TMailQueueData = {
  email: string
}

// Define the queue name
const queueName = 'mail-queue'

// Create a new queue called "mail-queue".
export const mailQueue = new Bull(queueName, process.env.REDIS_URL) // Replace with your Redis connection string

// Listen to the "mail-queue" events
mailQueue.isReady().then(() => {
  console.log('Mail queue is ready!')
})
mailQueue.on('active', (job) => {
  console.log('Job is active:', job.id)
})
mailQueue.on('completed', (job) => {
  console.log('Job is completed:', job.id)
})

// Create a new worker handler
const mailHandler = async ({ email }: TMailQueueData) => {
  console.log('Sending email to:', email)

  // A long running process

  console.log('Email sent!')
}

;(async () => {
  // Process all upcoming jobs in the queue
  mailQueue.process(({ data }: Job) => mailHandler(data))
})()
Let’s break down what’s happening here:
- We use Bull to create a queue called
mail-queue(line 12). This queue will manage jobs related to sending emails. The Redis connection string is passed as an argument to connect Bull to your Redis instance. You can replaceprocess.env.REDIS_URLwith the actual Redis connection URI or set theREDIS_URLenvironment variable in your.envfile. - We will be listening to the
mail-queueevents (line 15-23):- The
isReady()method ensures that the queue is fully connected to Redis, and logs a message when the queue is ready to start processing jobs. - The
on('active')event logs when a job is actively being processed. - The
on('completed')event logs when a job is successfully completed.
- The
- The
mailHandlerfunction (line 26-32) is an asynchronous handler that processes each job in the queue. It accepts the email from the job data and proceeds to send the email. - Finally, the
mailQueue.process()method (line 36) ensures that the queue continuously processes jobs using themailHandlerfunction. Each job in the queue will be passed to the handler to execute the defined long-running task.
Adding a Job to the Queue
Now that we’ve set up the queue and worker, the next step is to add new job to the queue. In this example, we will add the job in a Next.js Route handler. Let's create an API route that receives an email address and adds a job to the queue.
import { NextResponse } from 'next/server'

const mailQueue = new Bull('mail-queue', process.env.REDIS_URL)

export default async function POST(request: Request) {
  const { email } = await request.json()

  // Add a job to the queue
  await mailQueue.add({ email })

  res.status(200).json({ message: 'Mail sent' })
}
Let’s break it down:
- This is a simple API route in Next.js that listens for POST requests.
- When a POST request is made to this route, the email address is extracted from the request body. The request is expected to be in JSON format, so we use
request.json()to parse the body. - Once we have the email, we call
mailQueue.add()to add a new job to themail-queue. The job data (in this case, the email address) is then passed to the queue. This will trigger the worker we created earlier to process the job. - After the job is added to the queue, we return a JSON response to the client with a message confirming that the email has been sent (or at least queued for sending).
Testing the Setup
Once everything is in place, it’s time to test the setup to make sure your queue is working as expected.
First, run the Next.js development server:
npm run dev
Then, split your terminal and run the queue:
node --import=tsx src/workers/mail.ts
Then, split your terminal again. You can use curl to send a POST request to your newly created API route.
Here’s a curl script you can use to hit http://localhost:3000/api/mail with an email in the body:
curl -X POST http://localhost:3000/api/mail \
  -H "Content-Type: application/json" \
  -d '{"email": "nico@hyperjump.tech"}'
Here’s a quick breakdown of the command:
-X POST: Specifies the request method as POST.http://localhost:3000/api/mail: The URL of your API route.-H "Content-Type: application/json": Sets the content type to JSON.-d ‘{"email": "some@example.com"}’: The data you are sending in the request body, in this case, the email address.
When you run this command, it will hit the API end point to add a new job to the mail-queue. If everything is set up correctly, you should see logs from the worker processing the job and handling the long-running task.
Image

Refactoring for Multiple Queues
In the previous example, we only run the mail queue. But what if you want to add more queues? Let’s refactor the setup to handle multiple queues more efficiently.
Move the
mail.tsfile. Create ajobsfolder in thesrc/queuesfolder. Then, move themail.tsfile to the newjobsfolder.Refactor the queue files. In each queue file (like
mail.ts), remove the Immediately Invoked Function Expression (IIFE) and replace it with a simple export that contains the queue and handler. For example:
// From this
;(async () => {
  // Process all upcoming jobs in the queue
  mailQueue.process(({ data }: Job) => mailHandler(data))
})()

// To this
export const queueConfig = {
  queue: mailQueue,
  handler: mailHandler,
}
This makes the queue reusable and allows us to load it dynamically.
- Create an entrypoint file. Next, we’ll create an entry point file to load and start all available queues:
import path from 'path'
import fs from 'fs'
import type { Job } from 'bull'

const fsPromise = fs.promises

const pathname = path.resolve(__dirname, 'jobs')

/**
 * Start worker based on the provided file.
 * @param file The file representing the worker.
 * @param jobsDirectory The directory where worker files are stored.
 */
async function startWorker(filename: string, jobsDirectory: string) {
  try {
    // Load all queues from jobs folder
    const q = await import(path.join(jobsDirectory, filename))
    const { queueConfig } = q
    const { queue, handler } = queueConfig

    // Run the worker handler
    queue.process(({ data }: Job) => handler(data))
  } catch (error) {
    console.error(`Error loading queue ${filename}:`, error)
  }
}

/**
 * Initializes all workers found in the specified directory.
 */
;(async function () {
  try {
    console.info('Starting workers...')
    const files = await fsPromise.readdir(pathname)
    files.forEach((file) => startWorker(file, pathname))
  } catch (err) {
    console.error(err)
  }
})()
This entry point script will dynamically load all queue files from the src/queues/jobs/ folder and start their respective workers.
- Add a new queue. Create a new file called
push-notification.tsin thesrc/queues/jobsfolder. In this file, we’re going to create a queue specifically for sending push notifications.
import Bull from 'bull'

type TPushNotificationData = {
  id: string
}

// Define the queue name
const queueName = 'push-notification-queue'

// Create a new queue called "push-notification-queue".
export const pushNotificationQueue = new Bull(queueName, process.env.REDIS_URL)

// Listen to the "push-notification-queue" events
pushNotificationQueue.isReady().then(() => {
  console.log('Push notification queue is ready!')
})
pushNotificationQueue.on('active', (job) => {
  console.log('Job is active:', job.id)
})
pushNotificationQueue.on('completed', (job) => {
  console.log('Job is completed:', job.id)
})

// Create a new worker handler
const pushNotificationHandler = async ({ id }: TPushNotificationData) => {
  console.log('Sending push notification to device ID:', id)

  // A long running process

  console.log('Notification sent sent!')
}

export const queueConfig = {
  queue: pushNotificationQueue,
  handler: pushNotificationHandler,
}
Note that the important thing of a queue in this setup is to export the queue and handler as shown in the line 33-36 above. This allows us to load the queue dynamically in src/queues/entrypoint.ts.
- Add new route to test the push notification queue. Create a new file called
push-notification/route.tsin thesrc/app/apifolder. In this example, we’re going to create a new route to send push notifications to a specific device ID.
import { NextResponse } from 'next/server'

const pushNotificationQueue = new Bull('push-notification-queue', process.env.REDIS_URL)

export async function POST(request: Request) {
  const { id } = await request.json()

  // Send the email
  pushNotificationQueue.add({
    id,
  })

  return NextResponse.json({ msg: 'notification sent' })
}
- Test the new setup. Now that we’ve refactored the setup for multiple queues, you can run all the queues by running the entrypoint script:
node --import=tsx src/queues/entrypoint.ts
This should start both the mail-queue and the push-notification queue, and you should see logs for both.
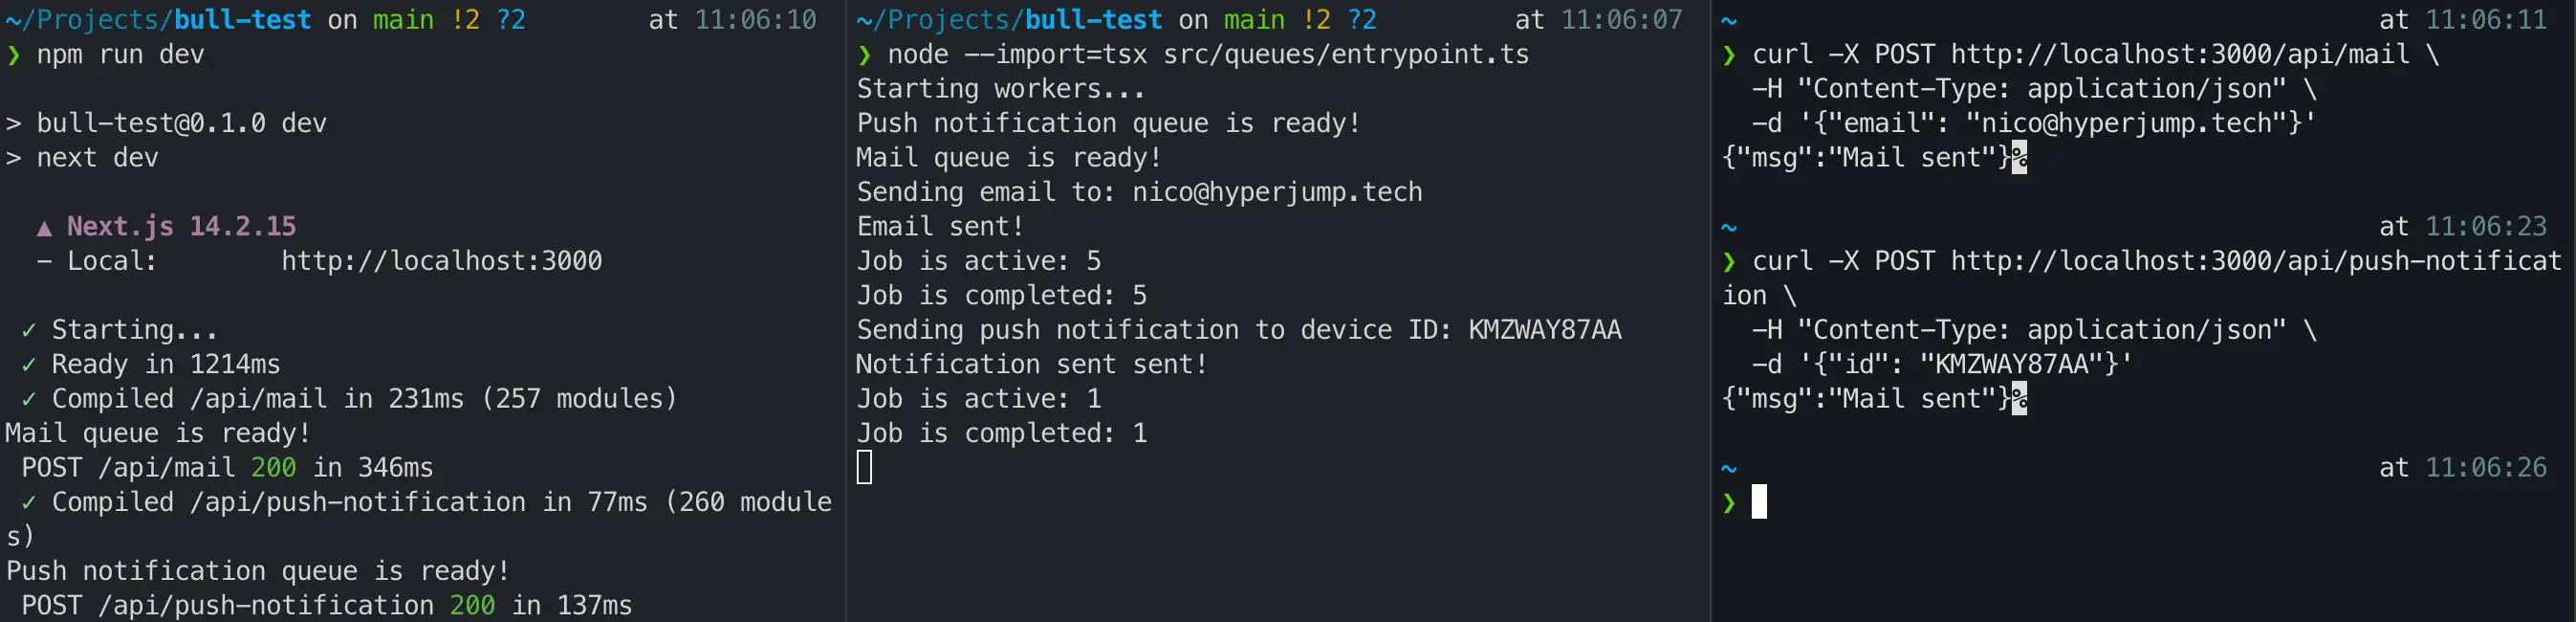
You can now send a POST request to the /api/push-notification route to send a push notification to a specific device ID. Here’s a curl script you can use to hit http://localhost:3000/api/push-notification with an ID in the body:
curl -X POST http://localhost:3000/api/push-notification \
  -H "Content-Type: application/json" \
  -d '{"id": "KMZWAY87AA"}'
If everything is set up correctly, you should see logs from the worker processing the mail and push notification job.
Image
If you need to have another queue, you can simply follow the same steps above.
Running App and Worker altogether
So far, we need to open separate terminals to run the queues and the app. But what if you want to run both the app and the queues altogether?
In this example, we’ll be using the tsx package to run the queues in a separate process. Here’s how you can do that:
- Install concurrently:
npm install --save concurrently
- Update the package.json scripts
"scripts": {
  "build": "next build",
  "lint": "next lint",
  "dev": "concurrently \"npm:next:dev\" \"npm:queue\"",
  "start": "next start",
  "next:dev": "next dev",
  "queue": "node --import=tsx src/queues/entrypoint.ts"
}
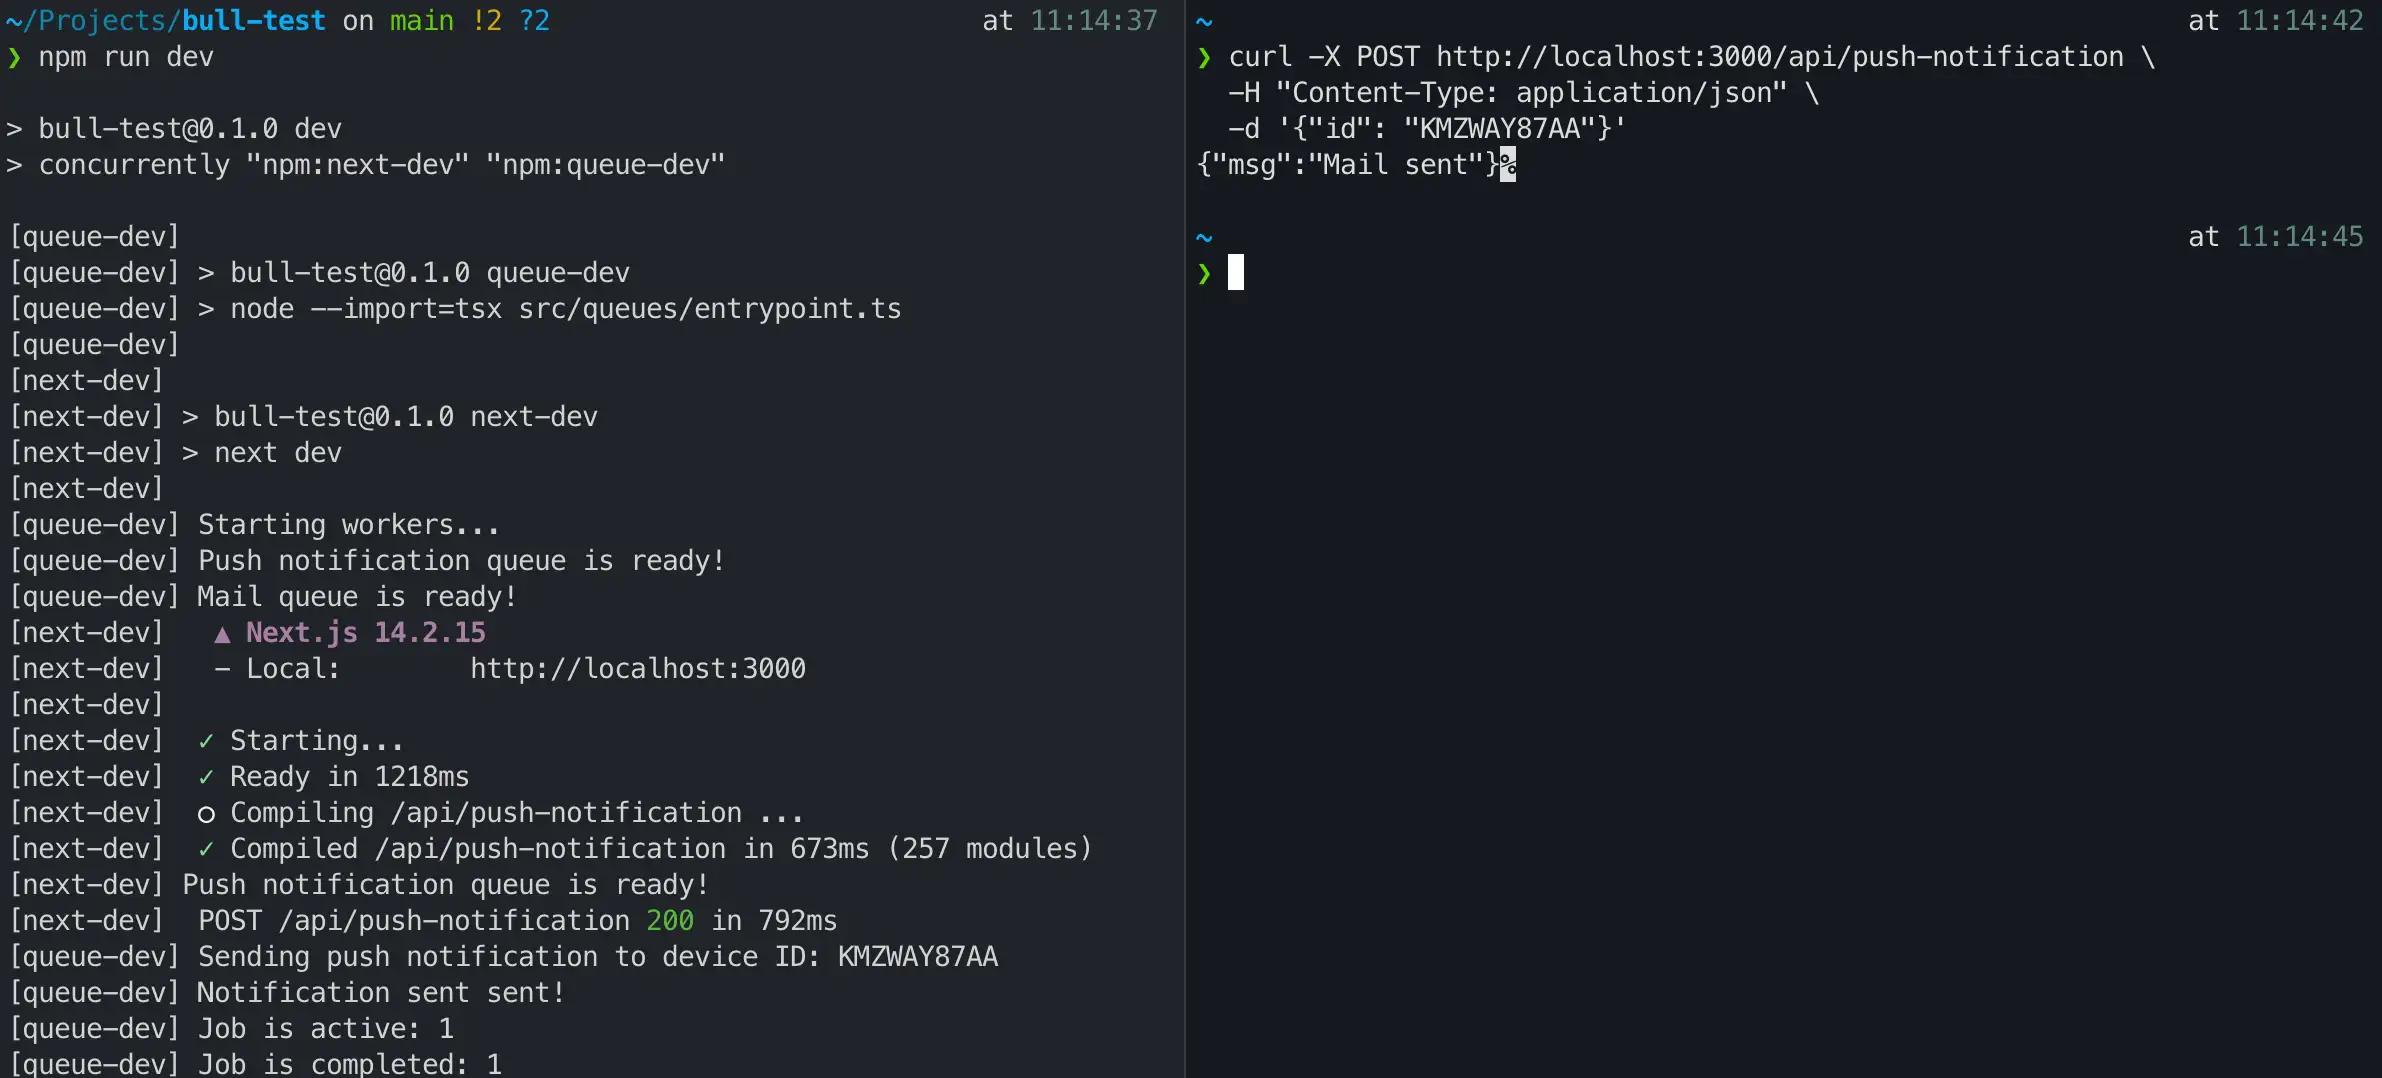
- Test the setup. You can run all the queues and the app altogether by running:
npm run dev
Proceed by hitting the mail or push notification route to send a job to the queue. You should see logs from both the app and the queues in the same terminal.
Image
Running in Production
As mentioned at the beginning, this queue is not possible to be run on Vercel. In our project, we deploy both the Next.js app and the workers to our own server using Docker and dokku. To run the queues in production, we use the following steps:
- Add several scripts to the
package.jsonfile to build and run the queues:
  "scripts": {
    "build": "next build",
    "lint": "next lint",
    "dev": "concurrently \"npm:next:dev\" \"npm:queue\"",
    "start": "next start",
    "next:dev": "next dev",
    "queue": "node --import=tsx src/queues/entrypoint.ts",
    "queue:prod": "node dist/entrypoint.js",
    "queue:build": "tsc src/queues/entrypoint.ts src/queues/jobs/*.ts --outDir dist/ --esModuleInterop --module commonjs --resolveJsonModule --skipLibCheck --target es2020"
  },
- Create a Dockerfile for the queue:
FROM node:21-alpine

WORKDIR /usr/queue

# Install dependencies
COPY package.json package-lock.json ./
RUN npm ci

# Copy the queue files
RUN mkdir -p src/queues
COPY src/queues src/queues

# Build the queues
RUN npm run queue:build

# Install a process manager
RUN npm install -g pm2

# Run the queues
CMD ["pm2-runtime", "npm run queue:prod"]
- You can deploy the image into a container registry or a cloud provider. For example, you can push the image to Docker Hub and deploy it to a droplet in Digital Ocean. Then run a container using the image.
Conclusion
Handling long-running tasks in your Next.js application can be a challenge, but by using Bull and Redis, you can easily offload these tasks to background workers and keep your app fast and responsive.
We walked through setting up a simple queue for sending emails, creating API routes to add jobs to the queue, and even refactoring the code to support multiple queues. Your app is now ready to sending emails, processing notifications, or any other background tasks.
You can find the full code for this post in the GitHub repository here.
ℹ️ As mentioned at the beginning, we use this technique in our Neo Sense service which is built using Next.js and powered by Monika. Using Neo Sense, you can get notified from whatever app you want (Telegram, Slack, etc) when your website or API is down based on HTTP status code or content of the response, or even when your server is slow.
Read more about Neo Sense here.
By the way, I'm making a book about Pull Requests Best Practices. Check it out!